Many large and small businesses have finally proved that not using Facebook’s Business Manager pretty much means leaving money on the table because of missed opportunities.
While tools such as Business Managers are often met with a shrug and a groan, probably because it sounds and looks complicated at first sight, the truth is your business needs Business Manager if you want to improve the efficacy of your brand’s marketing.
This will guide you through creating a solid Facebook Business Manager account and sharing access with an agency.
What is Facebook’s Business Manager?
But first, let us answer that burning question, “What does Facebook Business Manager do, anyway?”
Well, Business Manager enables users to manage all their marketing efforts from a single dashboard and then share access to those assets with other team members, vendors, and partner agencies. Business
Manager has been created to run three primary functions:
- The creation and management of multiple assets include — your Facebook page, audience list, product catalog, and Instagram account.
- Granting user permissions and access — Since you will be your Business Manager, you will create and control access permissions for your team, which will keep track of whoever has access to your Ad accounts or pages, including the apps. This gives you complete control over your entire asset lineup.
- Ad tracking — This allows you to track your ads on Facebook and Instagram. Here you will get easy access to detailed overviews and reports on crucial ad metrics, such as the number of
impressions and your ad spending.
Now that we have gotten that out of the way let us understand why you are here. Creating your Facebook Business Manager page:
Step 1: Setup Your Business Manager Account
You must log on to https://business.facebook.com/ to set up your account. Click on the ‘create account’ button on the page, and you will be sent to Facebook’s official login page, where you can log in just as you usually do.
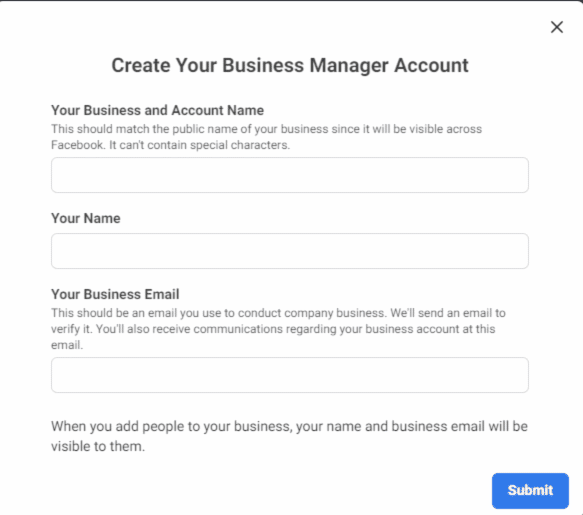
Step 2: Create Your Profile
Now, type in the name of your business. This will be the name that will appear on your business account, and click ‘Continue.’ Next, you will be asked to create a business profile by simply signing in with your name and email address and clicking ‘Finish.’ Easy peasy!
This should launch you straight to the Business Manager app, which is your dashboard of controls from where you will view analytics, set parameters, and work on your Facebook and Instagram ads.
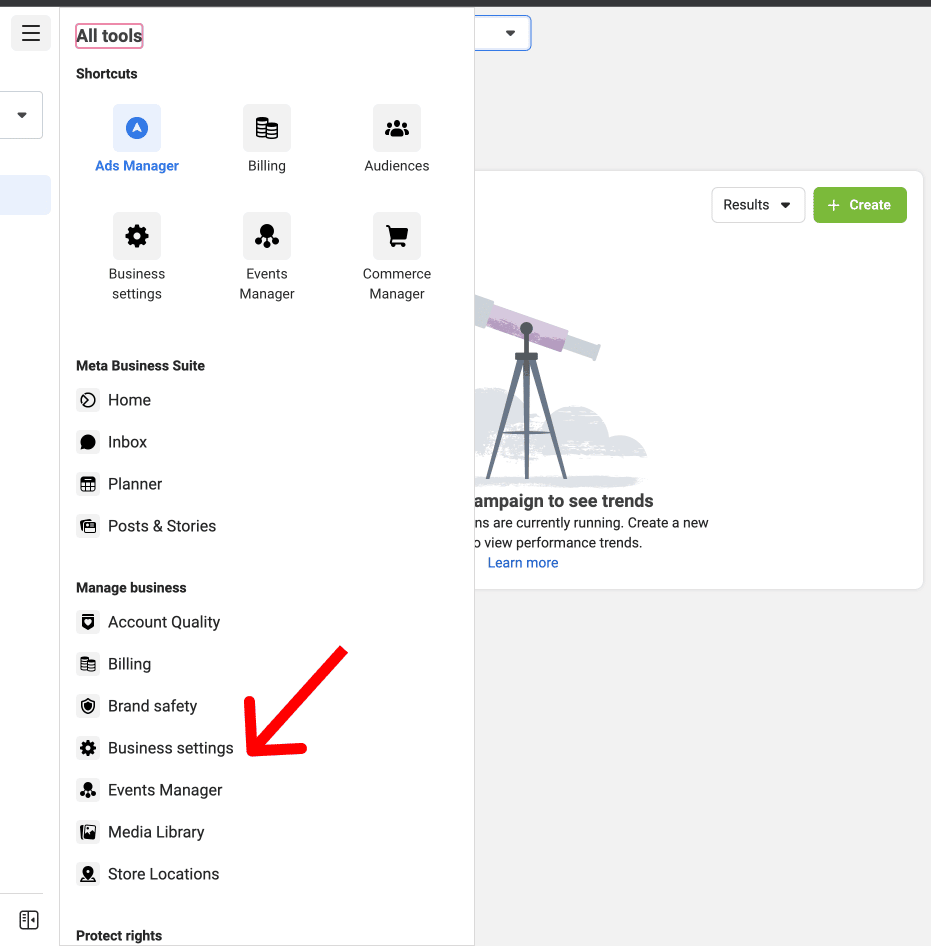
Step 3: Claim Your Facebook Business Page
Once you are in, the first prompt you will receive will be to claim your Facebook Business page if you have not already. For that, go to business Settings from the navigation bar. The Business page and ad account setup will be visible on the dashboard.
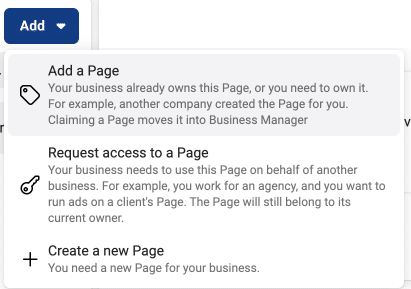
Step 4: Add New Accounts
You will be prompted to add new accounts, create new ad accounts, or request access to other ad accounts. The ‘Manage Settings’ menu gives you complete control over your Business Manager page.
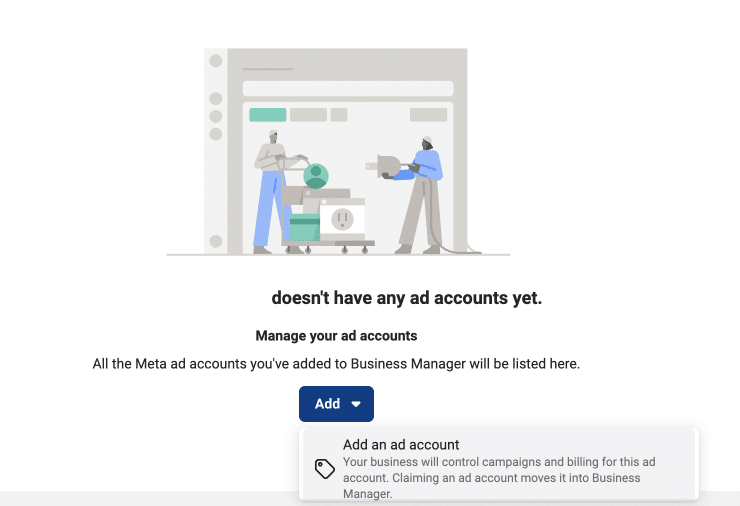
Step 5: Create Your Ad Account
Assuming you do not have one already, this is where you will create your Facebook Ad account, which will be under the Business Manager Settings. All you must do is click on ‘Create Ad Account.’ You must include your information, including the ad account name, the business manager profile you want to connect to, preferred time zones, and currency. Click ‘Create Ad Account.’
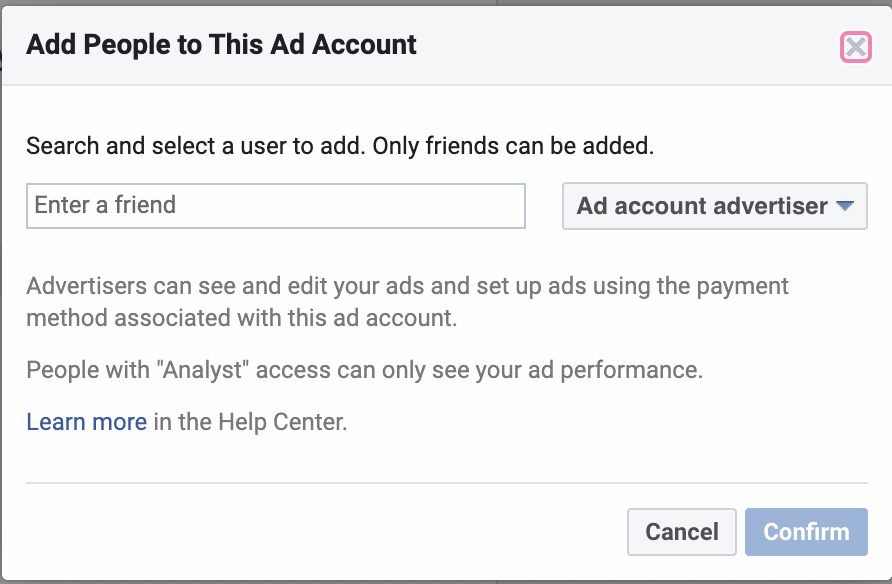
Step 6: Add People to the Account
After filling in the required details, you will be asked to add any people you want to the new ad account. This option allows you to select default roles for each person you add. This is great for setting access levels and ensuring those added get access to the information they need and nothing more. This section can be edited later, so there is no need to panic if you have made a mistake.
Step 7: Setup Method of Payment
Before earning, you will have to set the payment method on Facebook Business Manager. You can click and edit the payment method details according to your personal preferences.
Step 8: Granting Access to an Agency
You may need the help of an agency that can ensure your Ads are on point while you are away. Granting access to an agency has been made extremely easy on Facebook Business Manager. But you can only give access to those with a Facebook account.
The following is a quick breakdown of the process:
- Go to Business settings.
- Click on ‘Partners’ just below Users.
- Click ‘+ Add.’
- Select ‘Give a partner access to your assets.’
- Enter the Partner business ID and click on ‘Next.’
Now all you will have to do is add partners to assets as you deem fit. Choose the type of asset under the first column and use the second column to select the helps you want to add to your partner. There is a third column where you assign a specific role for said partner. You can repeat these steps for as many partners as you want to add to your Facebook Business Manager account.
Ending Note
Facebook Business Manager is an excellent asset for any business because more advertisers now know about and use it. This also prevents the need for gray social media accounts, such as using your personal Facebook Profile for business purposes (a big no-no).
A great reason to start creating your Facebook Business Manager today is that you will get better support from Facebook. If you already have a Facebook Business page and an ad account, importing them to Facebook Business Manager will be extremely easy.
Another reason why companies ought to use Business Manager is that it is free. That’s right! You’re getting enterprise-level tools at your fingertips for free. What more could you possibly ask for?
If you want to try something new and an easier way to connect all of these accounts, check this out!